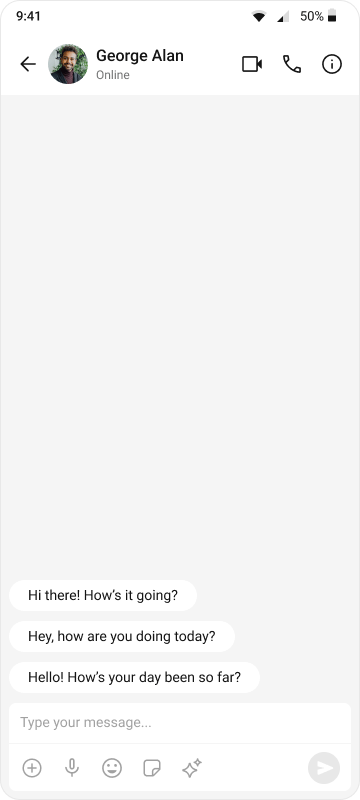
import React, { useEffect, useState } from "react";
import { View, Text, StyleSheet } from "react-native";
import { SafeAreaProvider, SafeAreaView } from "react-native-safe-area-context";
import { GestureHandlerRootView } from "react-native-gesture-handler";
import {
  CometChatMessageHeader,
  CometChatMessageList,
  CometChatMessageComposer,
  CometChatUIKit,
  UIKitSettings,
  CometChatThemeProvider,
  CometChatI18nProvider,
} from "@cometchat/chat-uikit-react-native";
import { CometChat } from "@cometchat/chat-sdk-react-native";

const APP_ID = "APP_ID";
const AUTH_KEY = "AUTH_KEY";
const REGION = "REGION";
const LOGIN_UID = "cometchat-uid-1";

// The user or group to chat with
const CHAT_WITH_UID = "cometchat-uid-2"; // Replace with actual UID
// const CHAT_WITH_GUID = "GUID"; // Uncomment for group chat

const App = (): React.ReactElement => {
  const [loggedIn, setLoggedIn] = useState(false);
  const [selectedUser, setSelectedUser] = useState<CometChat.User>();
  const [selectedGroup, setSelectedGroup] = useState<CometChat.Group>();

  useEffect(() => {
    const init = async () => {
      const uiKitSettings: UIKitSettings = {
        appId: APP_ID,
        authKey: AUTH_KEY,
        region: REGION,
        subscriptionType: CometChat.AppSettings
          .SUBSCRIPTION_TYPE_ALL_USERS as UIKitSettings["subscriptionType"],
      };

      try {
        await CometChatUIKit.init(uiKitSettings);
        await CometChatUIKit.login({ uid: LOGIN_UID });
        setLoggedIn(true);

        // Fetch the user to chat with
        const user = await CometChat.getUser(CHAT_WITH_UID);
        setSelectedUser(user);

        // For group chat, uncomment below:
        // const group = await CometChat.getGroup(CHAT_WITH_GUID);
        // setSelectedGroup(group);
      } catch (err) {
        console.error("Init/login/fetch error:", err);
      }
    };

    init();
  }, []);

  return (
    <GestureHandlerRootView style={{ flex: 1 }}>
      <SafeAreaProvider>
        <CometChatI18nProvider>
          <SafeAreaView style={styles.fullScreen}>
            <CometChatThemeProvider>
              {loggedIn && (selectedUser || selectedGroup) ? (
                <View style={styles.messagesWrapper}>
                  <CometChatMessageHeader
                    user={selectedUser}
                    group={selectedGroup}
                  />
                  <CometChatMessageList
                    user={selectedUser}
                    group={selectedGroup}
                  />
                  <CometChatMessageComposer
                    user={selectedUser}
                    group={selectedGroup}
                  />
                </View>
              ) : (
                <View style={styles.emptyState}>
                  <Text style={styles.emptyText}>
                    Set a user or group UID in App.tsx to start chatting
                  </Text>
                </View>
              )}
            </CometChatThemeProvider>
          </SafeAreaView>
        </CometChatI18nProvider>
      </SafeAreaProvider>
    </GestureHandlerRootView>
  );
};

const styles = StyleSheet.create({
  fullScreen: {
    flex: 1,
  },
  messagesWrapper: {
    flex: 1,
  },
  emptyState: {
    flex: 1,
    justifyContent: "center",
    alignItems: "center",
    backgroundColor: "#F5F5F5",
  },
  emptyText: {
    color: "#727272",
    fontSize: 14,
  },
});

export default App;