

AI Integration Quick Reference
AI Integration Quick Reference
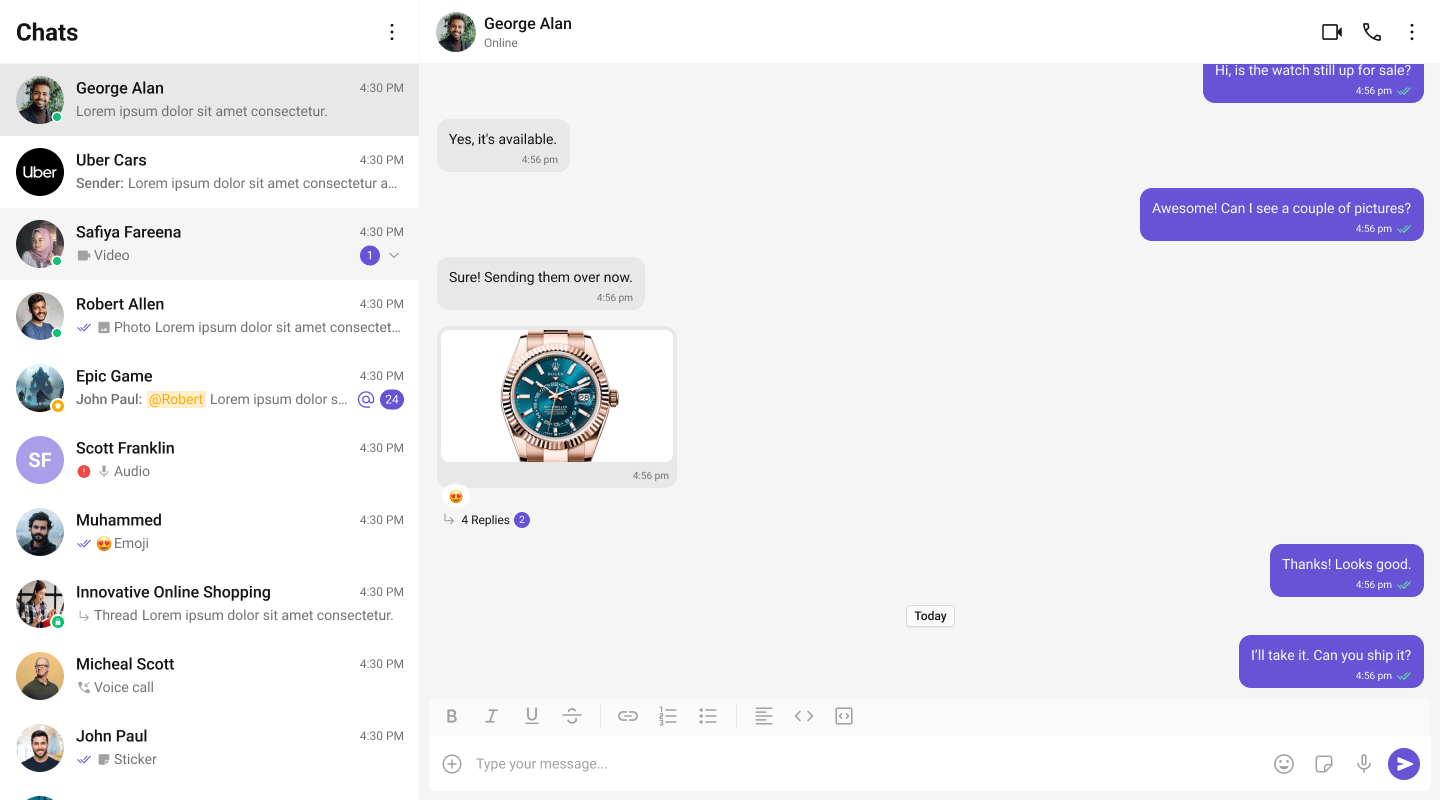
What You’re Building
Three sections working together:- Sidebar (conversation list) — shows all active conversations (users and groups)
- Message view — displays chat messages for the selected conversation in real time
- Message composer — text input with support for media, emojis, and reactions
Full Code
Create the client component with the chat UI, then import it dynamically in your page. Init and login happen in auseEffect before the provider mounts.
app/chat/CometChatClient.tsx
app/chat/chat.css
app/chat/page.tsx
How It Works
'use client'marks the component as a Client Component — required because CometChat uses browser APIs.dynamic(() => import(...), { ssr: false })prevents the component from rendering on the server, avoidingwindow is not definederrors.- CometChatProvider wraps the entire tree — it supplies theme, locale, and event context to all CometChat components.
- CometChatConversations renders the sidebar list. When a user clicks a conversation,
onItemClickfires with theConversationobject. - handleConversationClick extracts the
UserorGroupfrom the conversation and stores it in state. - Message components (
MessageHeader,MessageList,MessageComposer) receive eitheruserorgroupas a prop — never both at the same time.
Run
http://localhost:3000/chat. You should see the conversation list on the left. Click any conversation to load messages on the right.
Next Steps
One-to-One / Group Chat
Single chat window without a sidebar
Tab-Based Chat
Tabbed navigation with Chats, Calls, Users
Components Overview
Browse all prebuilt UI components
Theming
Customize colors, fonts, and styles